Get started with Bigin APIs in Postman
Postman is a versatile tool designed to help developers interact with APIs effectively. The Postman Collections feature enables you to test and explore APIs effortlessly, enhancing your ability to create seamless integrations.
We've added the Bigin API Postman collection to the Postman Public API Network. This collection enables you to get started with Bigin APIs in minutes and contains a comprehensive set of API requests that enable developers to build powerful integrations and toppings with a wide range of features. With these API requests, you can test and explore Bigin APIs in various environments for multiple organizations.
Prerequisites
Before you begin testing and exploring Bigin APIs with Postman, make sure you've met the following prerequisites:
- To utilize Bigin's APIs, you need a Bigin account. You can create your account instantly and without any cost at bigin.com.
- Register your application (client) with Bigin's authorization server. This process will assign OAuth 2.0 client credentials (like Client ID and Client Secret) to your application. These credentials are required in order to obtain access key tokens.
Step 1: Download the Postman app
Postman's native desktop app is compatible with Mac (both Intel and Apple silicon), Windows (both 32-bit and 64-bit), and Linux operating systems. To get the Postman desktop app, visit the download page↗ and select the version most suitable for your platform. For more information, see the Installing and updating Postman↗ guide.
You can also use Postman on the web↗ to quickly setup, test, and explore APIs.
Step 2: Fork the Bigin API Postman collection
When you fork the Bigin API Postman collection, you create a copy of it in your own Postman workspace. Forking allows you to make necessary changes to this copy without affecting the original collection.
To fork the Bigin API Postman collection, click the Run in Postman button below, and when prompted, proceed by clicking the Fork Collection button. You'll need to sign in to your Postman account. If you haven't signed up yet, create a free account with Postman.
Step 3: Set up your environment
When you fork the collection into your own Postman workspace, your Setup Details environment will be generated automatically. This environment contains pre-defined variables for which you need to add key tokens and a base URL for your account's API requests.
In this step, we'll explain how to set up and add values to the variables in the Setup Details environment.
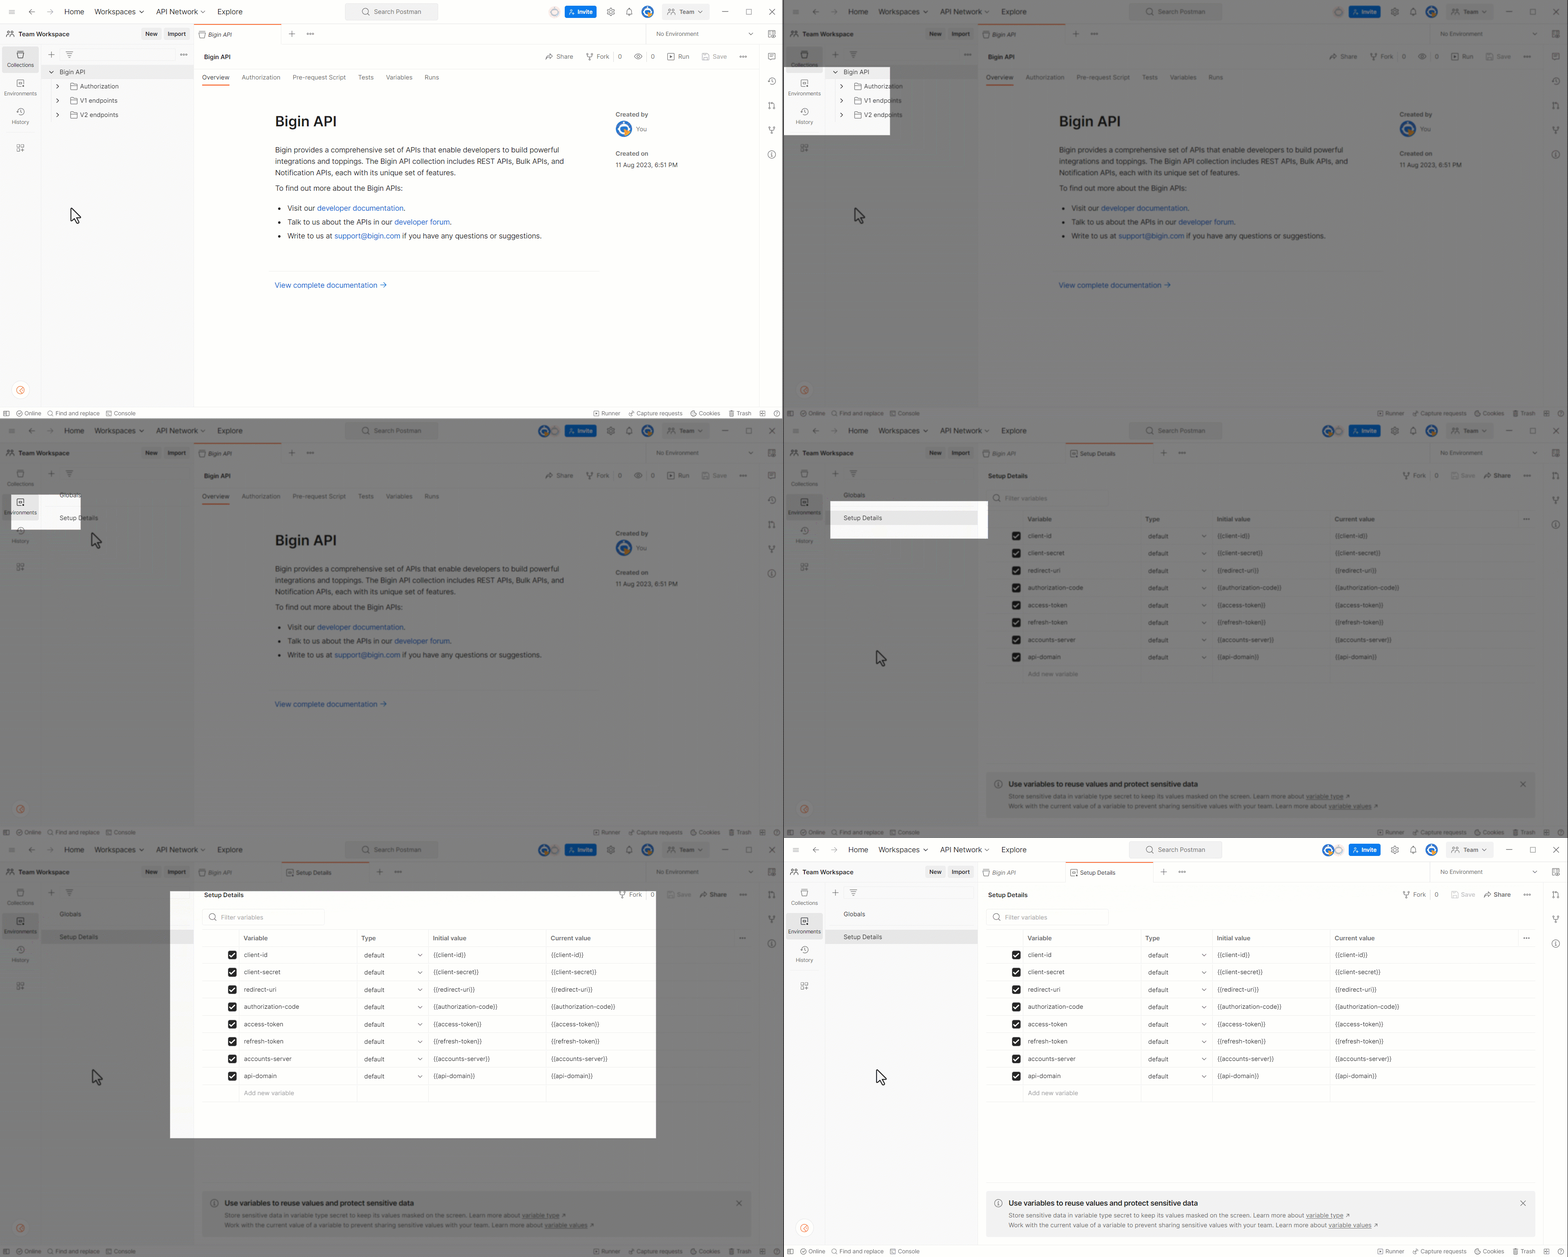
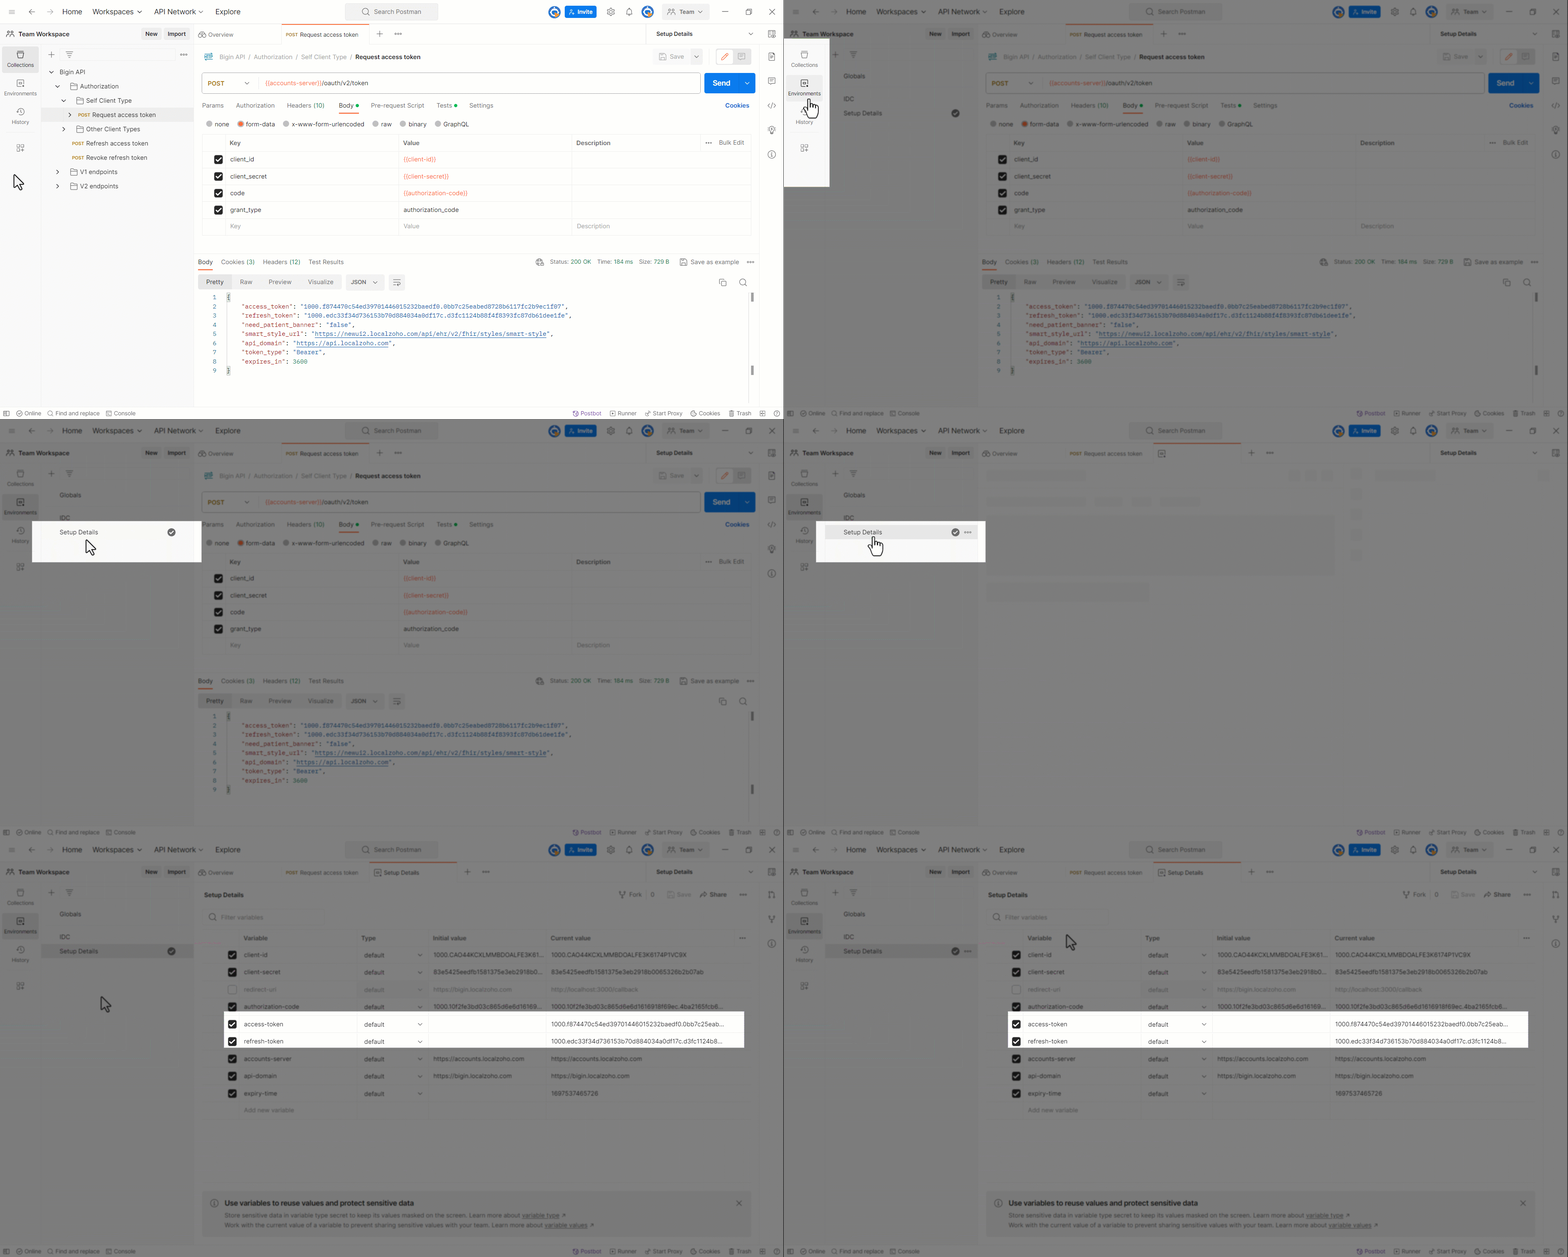
To add values for the list of variables, navigate to Environments > Setup Details in the workspace's left panel. The list of variables should appear.
Next, add values for each variable that you've generated through Bigin's authorization server.
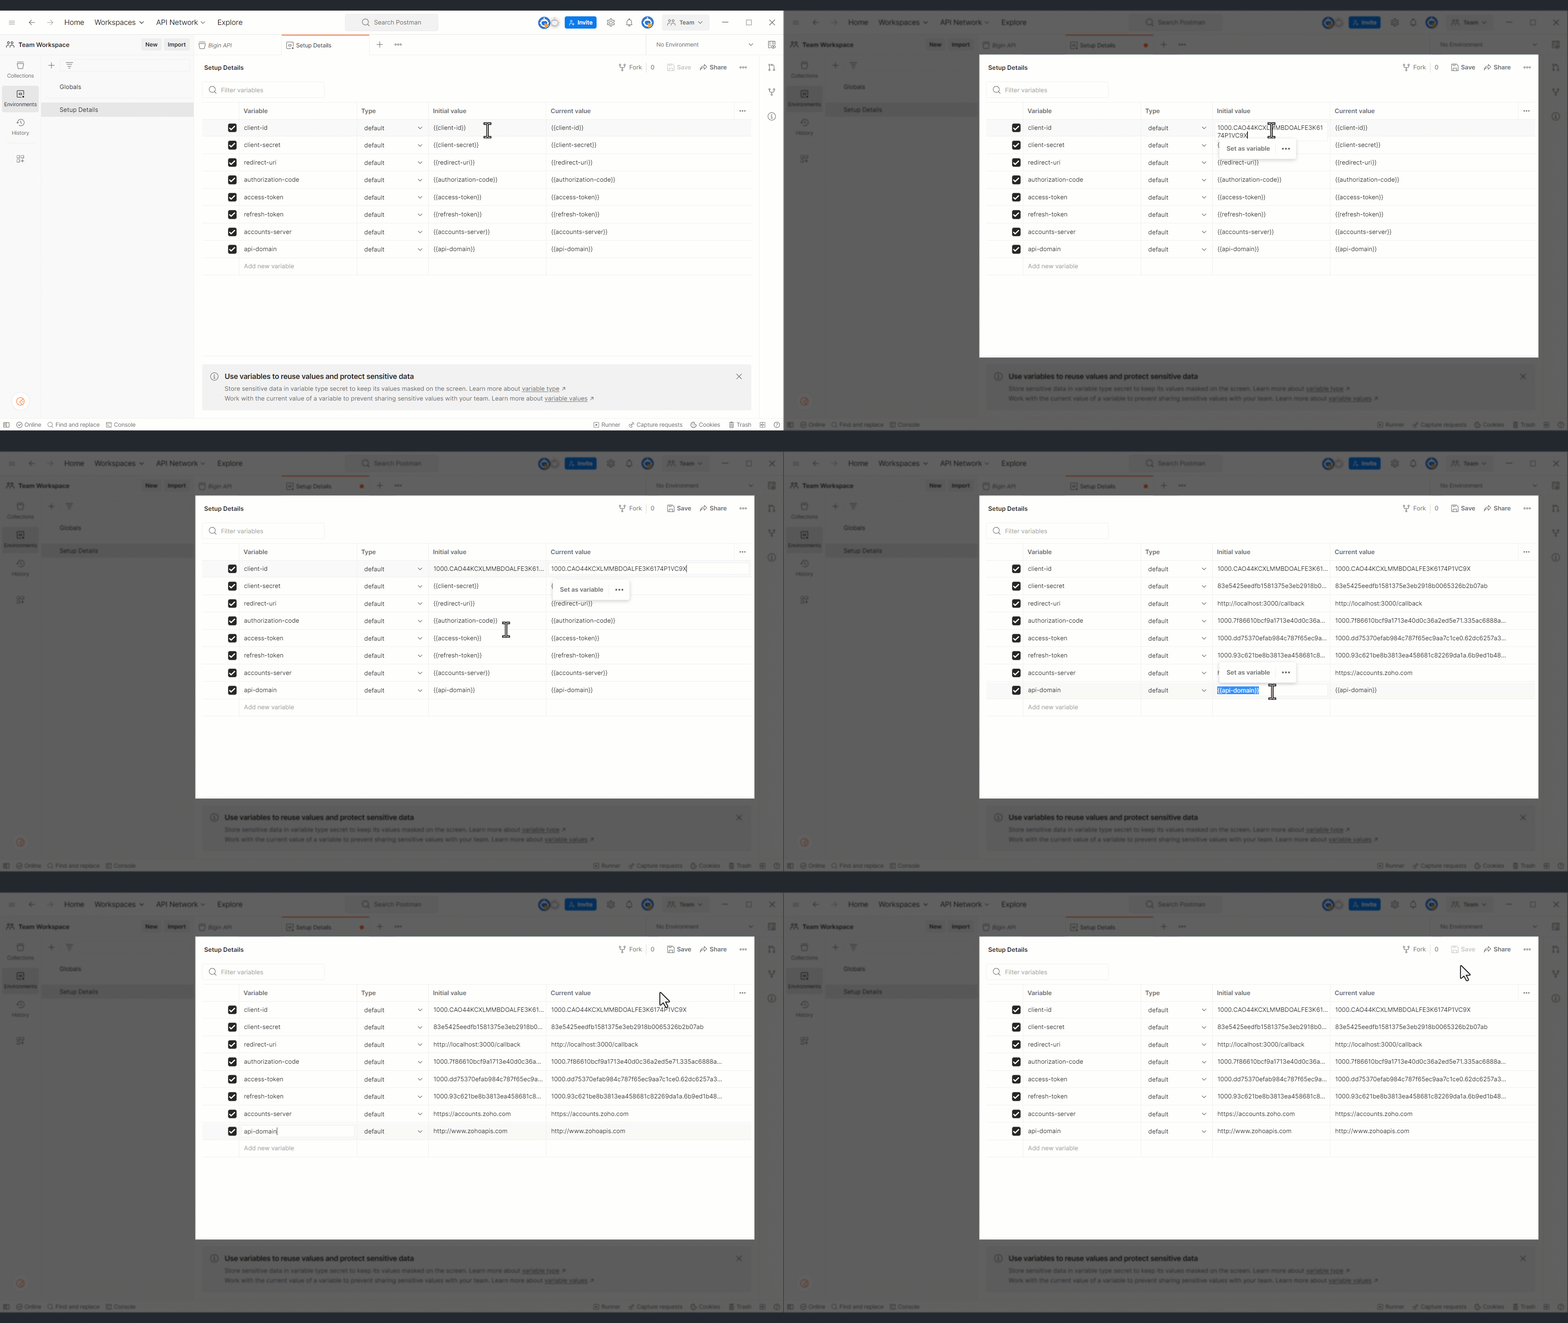
Each client type has its own set of required variables. Ensure you provide the necessary variables for your registered client type and ignore any extra variables that don't apply. For example, if you've registered as a Self Client, you can skip the non-mandatory 'redirect_uri'. Check out the OAuth 2.0 overview section for more details about client types and their required set of variables.
After you've added your credentials as variables, select the Setup Details environment. To select, hover over the Setup Details environment and then click the Set active icon, or alternatively, navigate to your collection and choose Setup Details from the dropdown menu in the top-right corner.
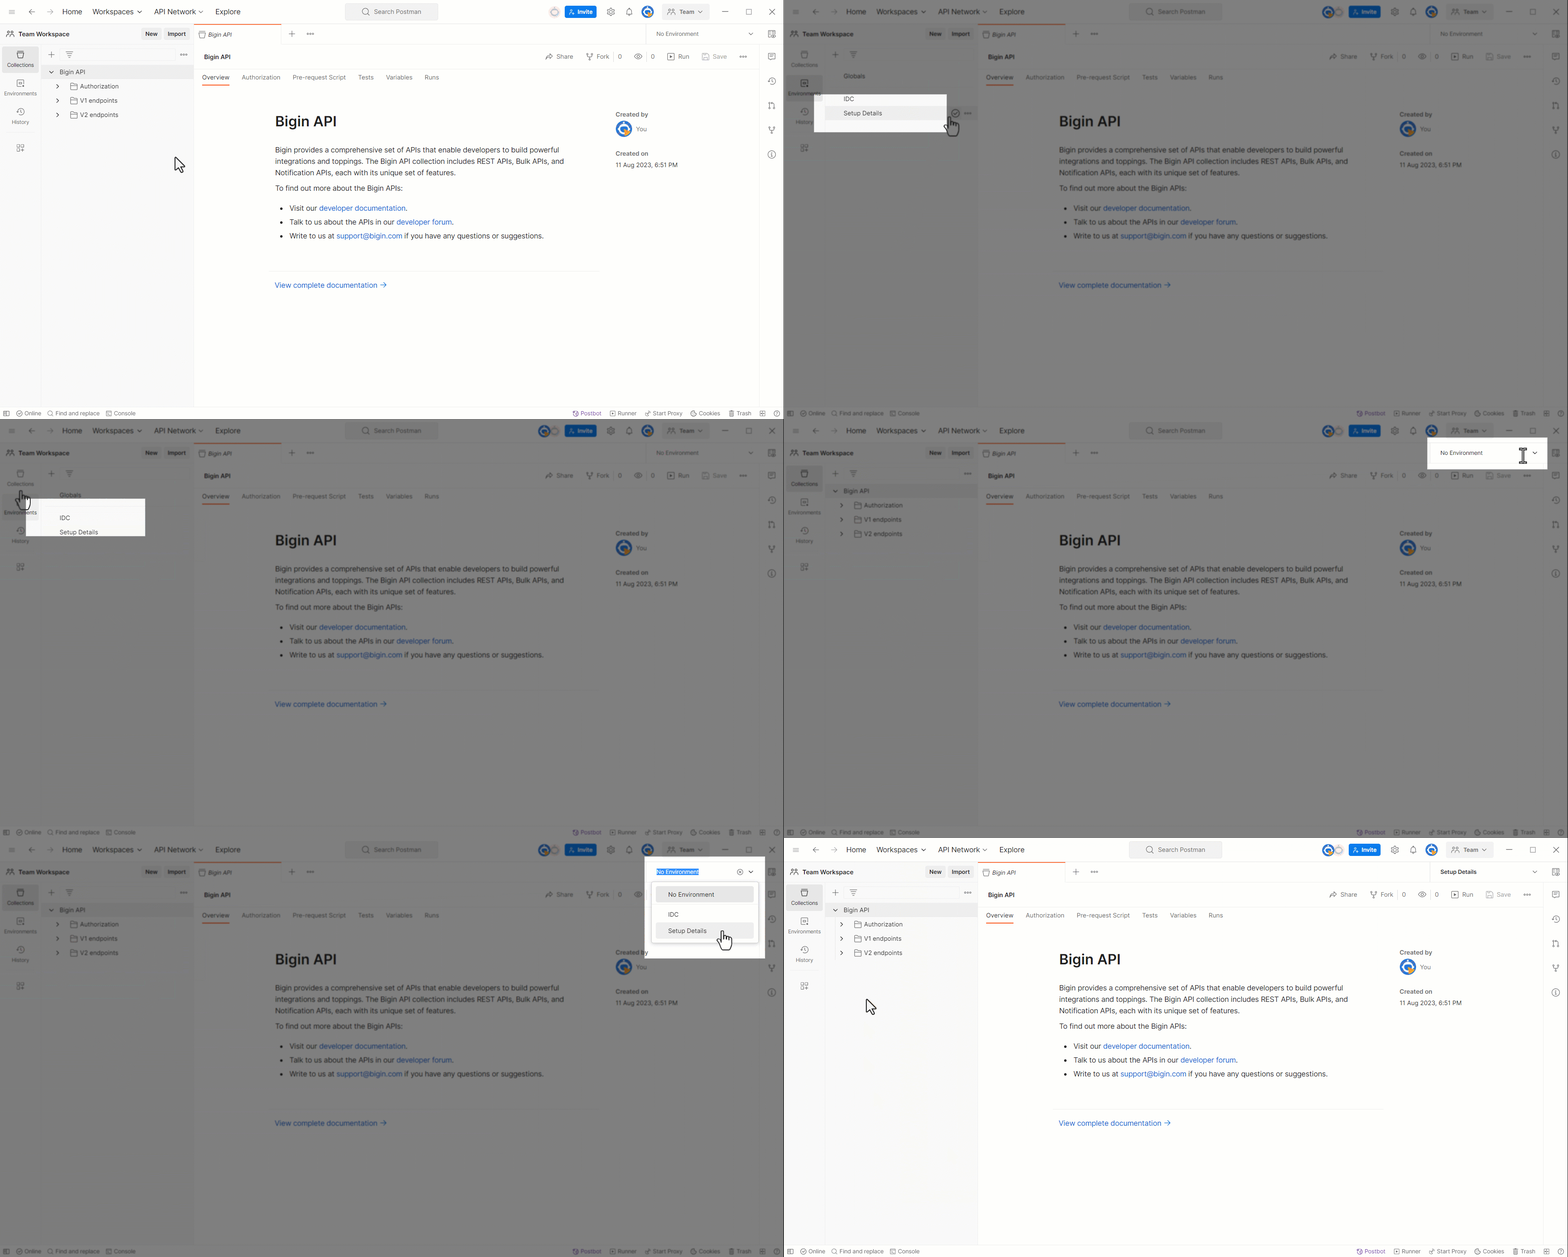
This step is essential because each endpoint's parameters automatically use the variables from this environment.
Step 4: Authorization
Bigin APIs require authorization when clients want to access protected resources. To do this, clients must first register and obtain specific tokens. For each request, a short-lived token with specific permissions must be included in the authorization header in order to access protected resources securely.
In this step, generate access and refresh tokens, and ensure that they're automatically populated in the Setup Details environment and the relevant parts of the API requests.
Use your forked collection for generating access and refresh tokens. To generate, click the Authorization folder and navigate to the Request access token endpoint in the workspace's left panel.
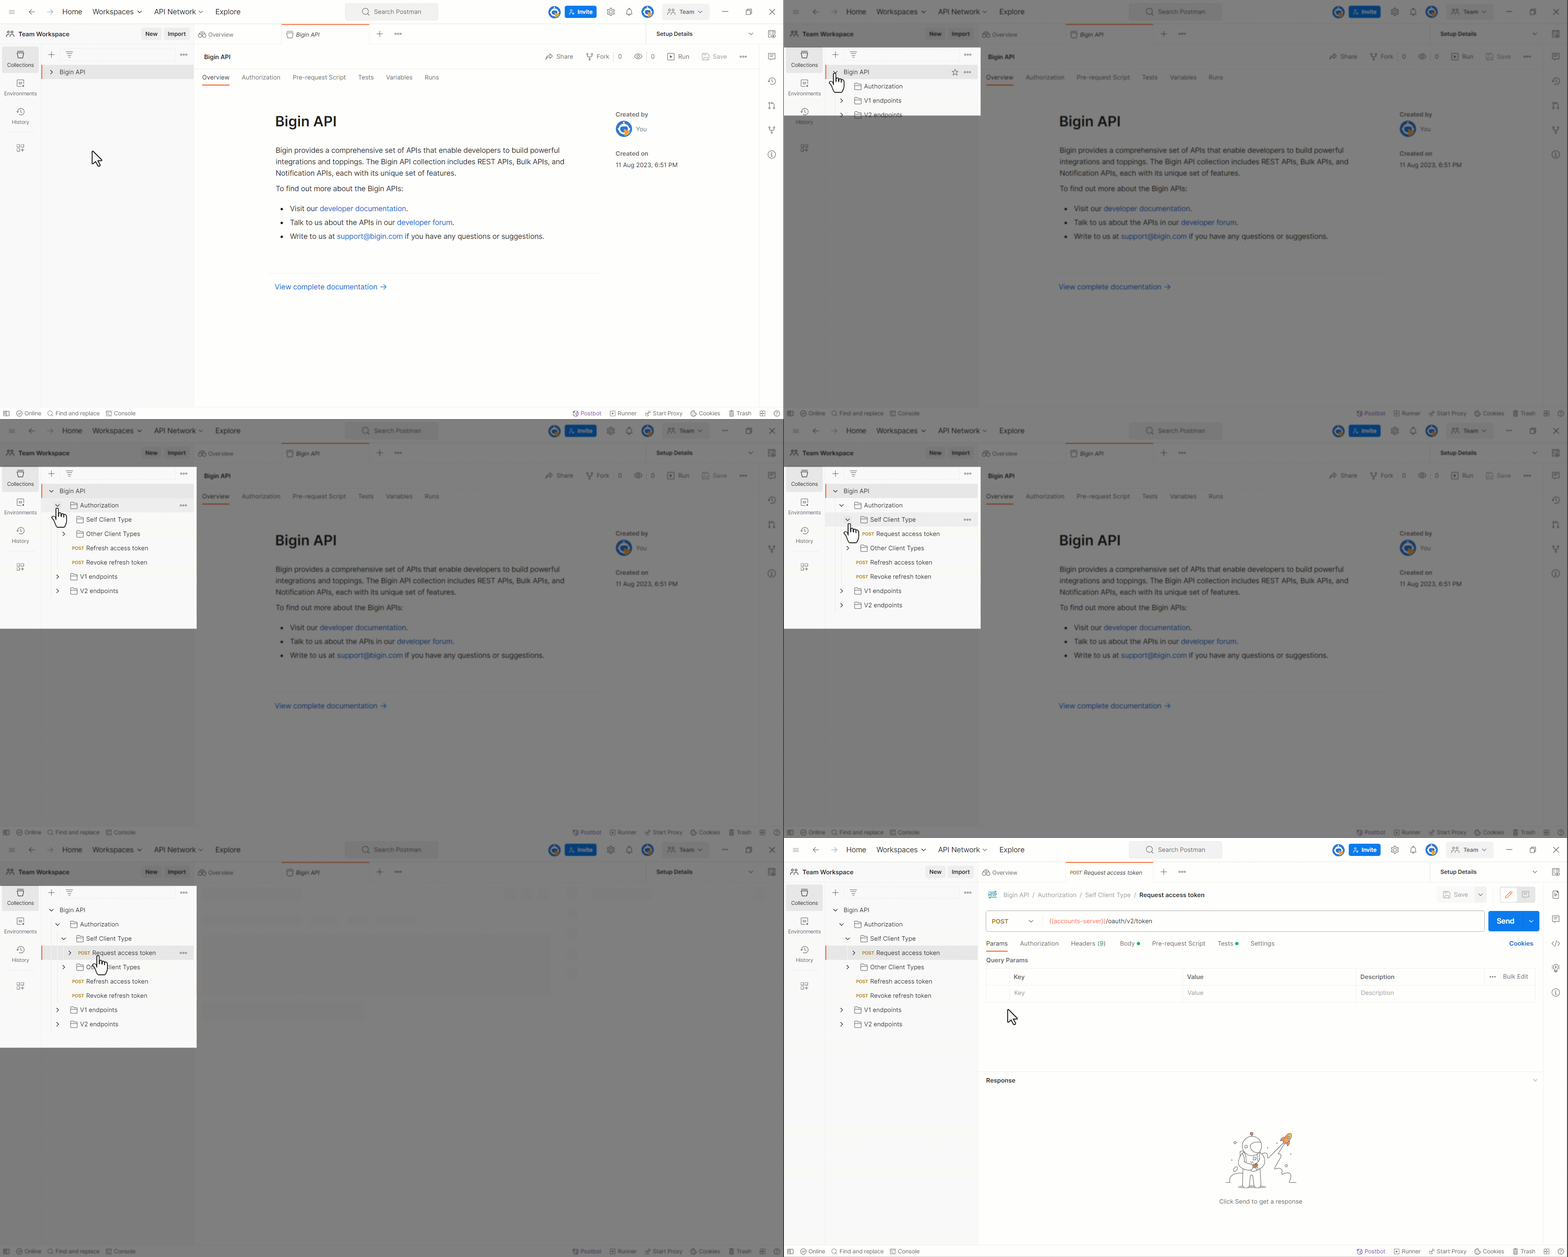
Notice that the endpoint has already been configured with the necessary details.
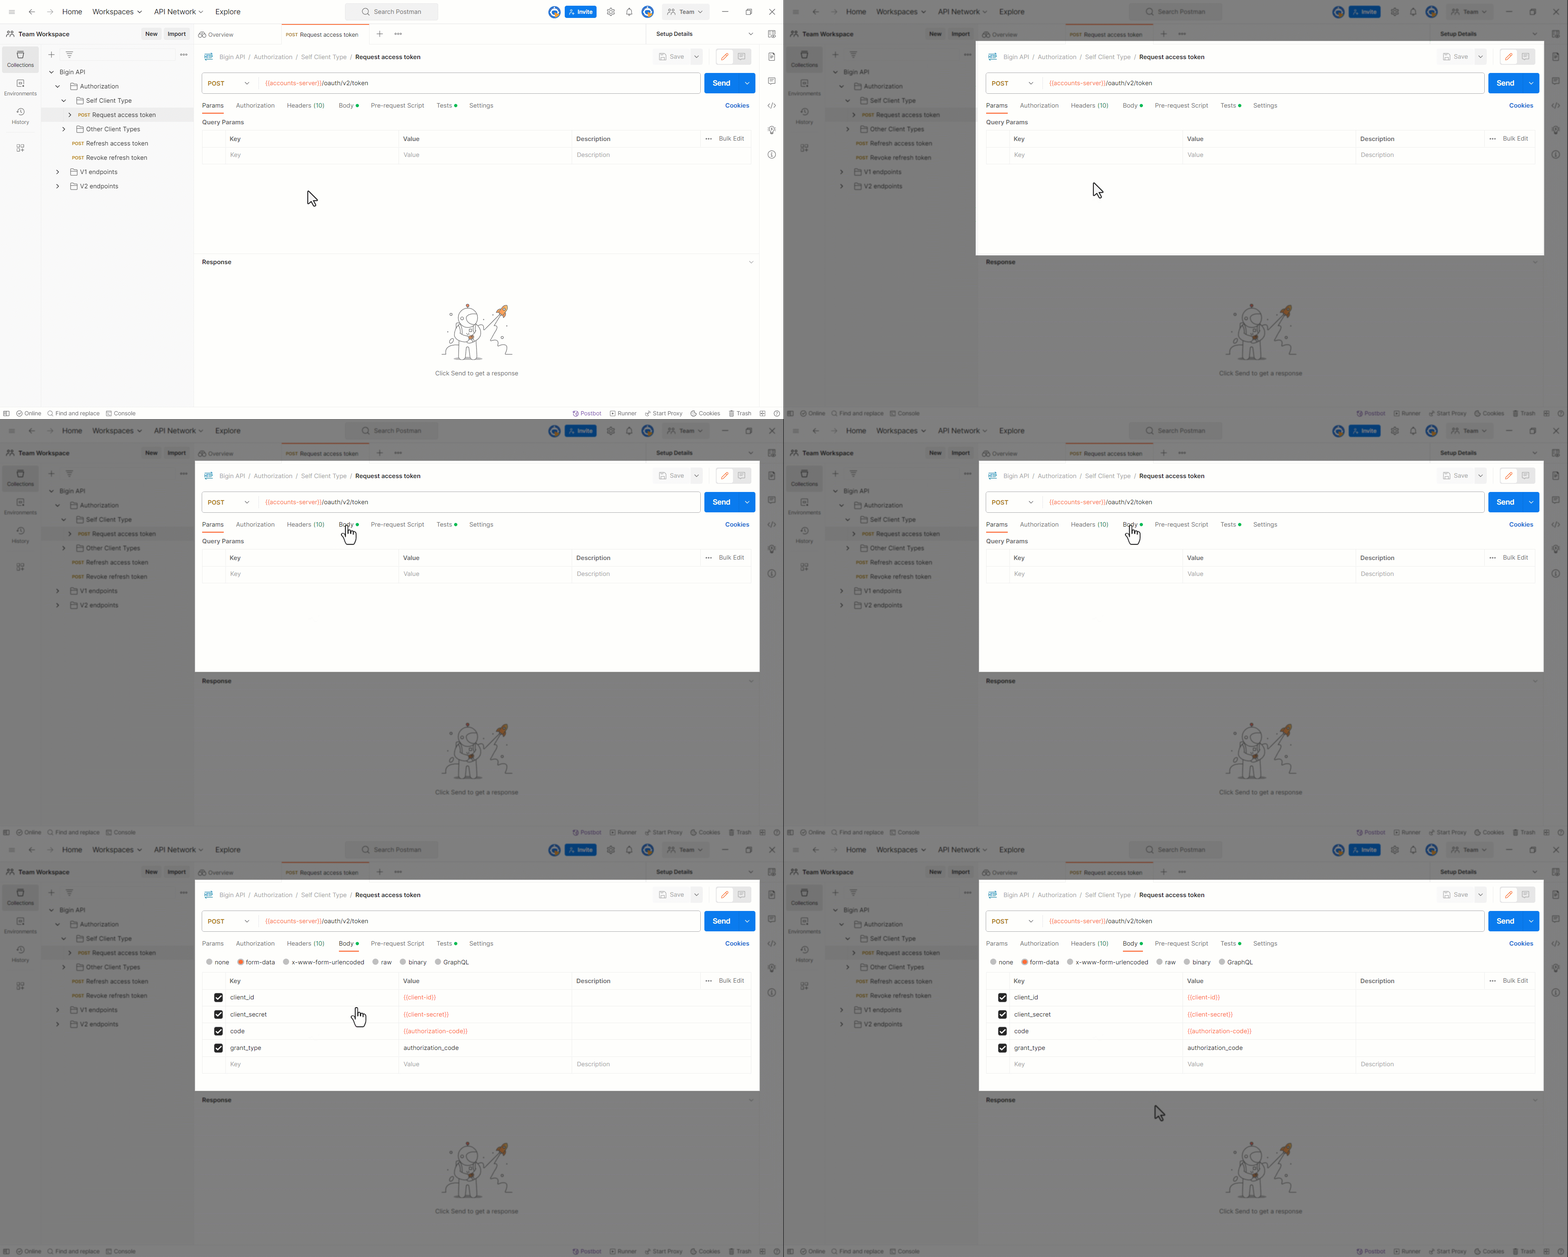
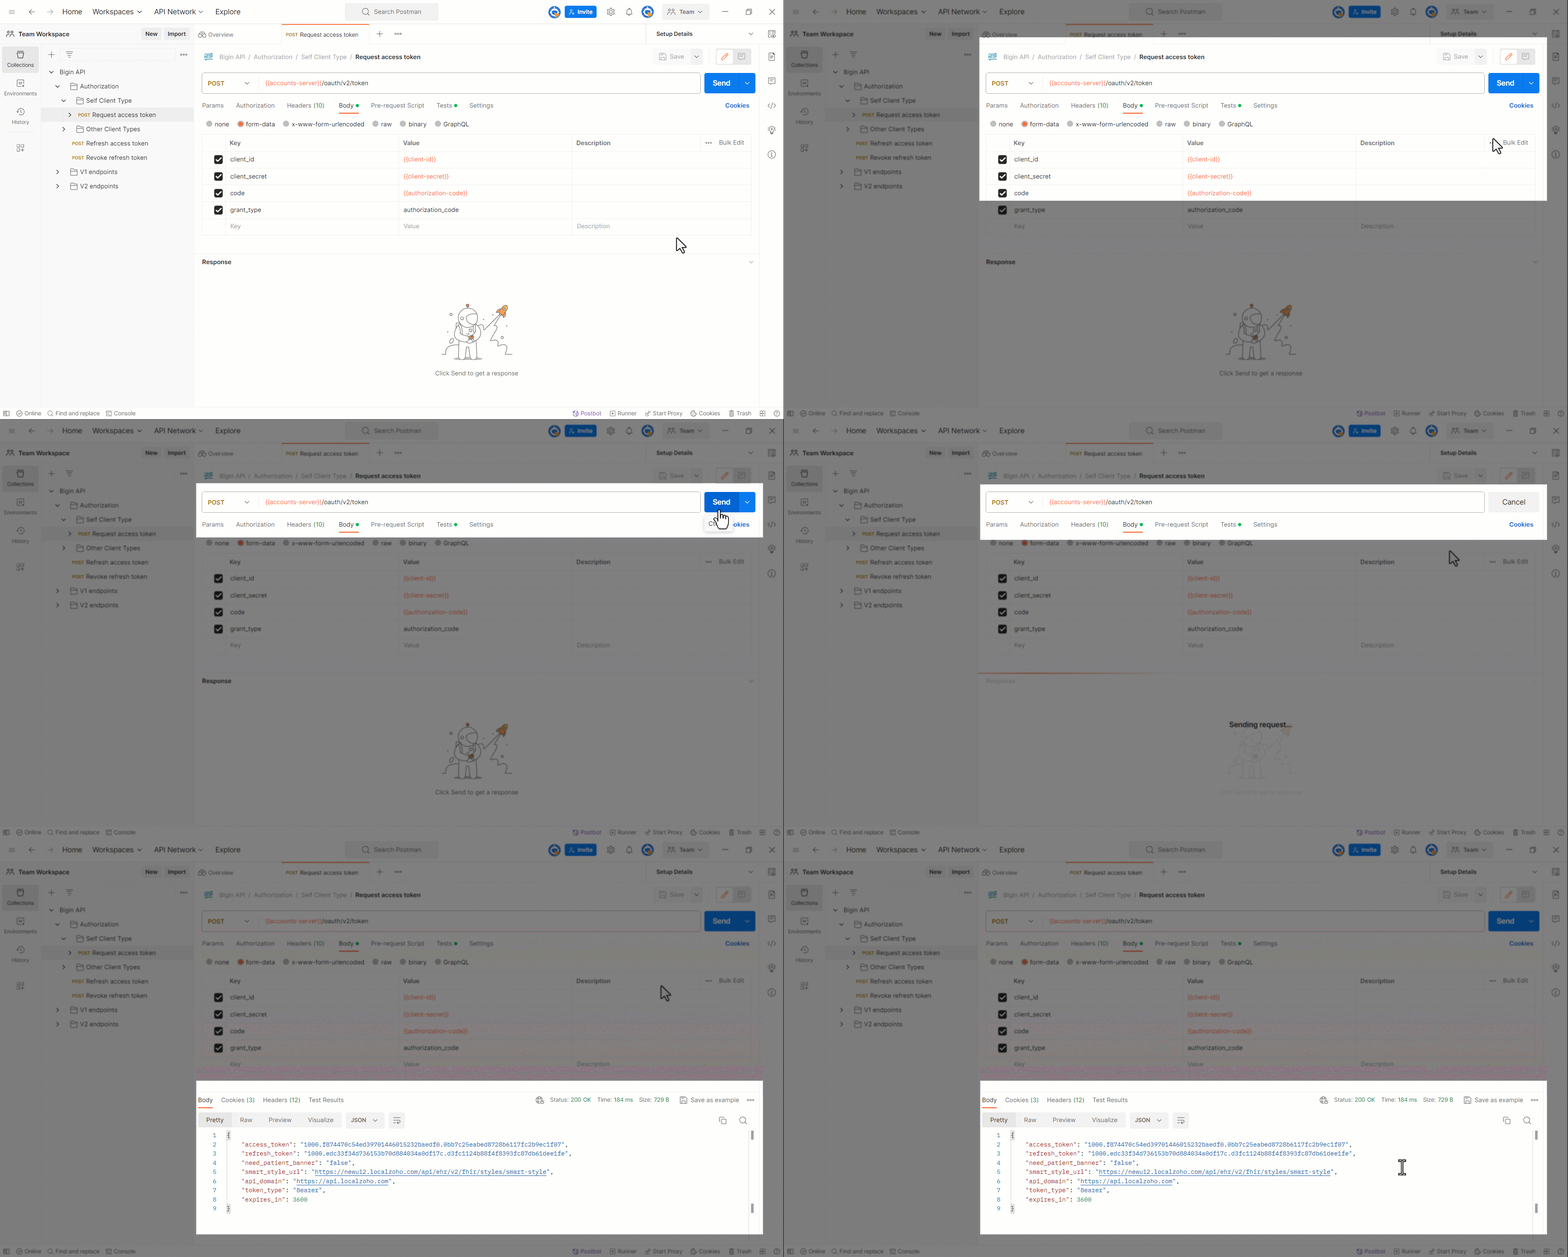
All you need to do now is click the Send button next to the endpoint. Upon a successful request, you'll receive the access_token and refresh_token.
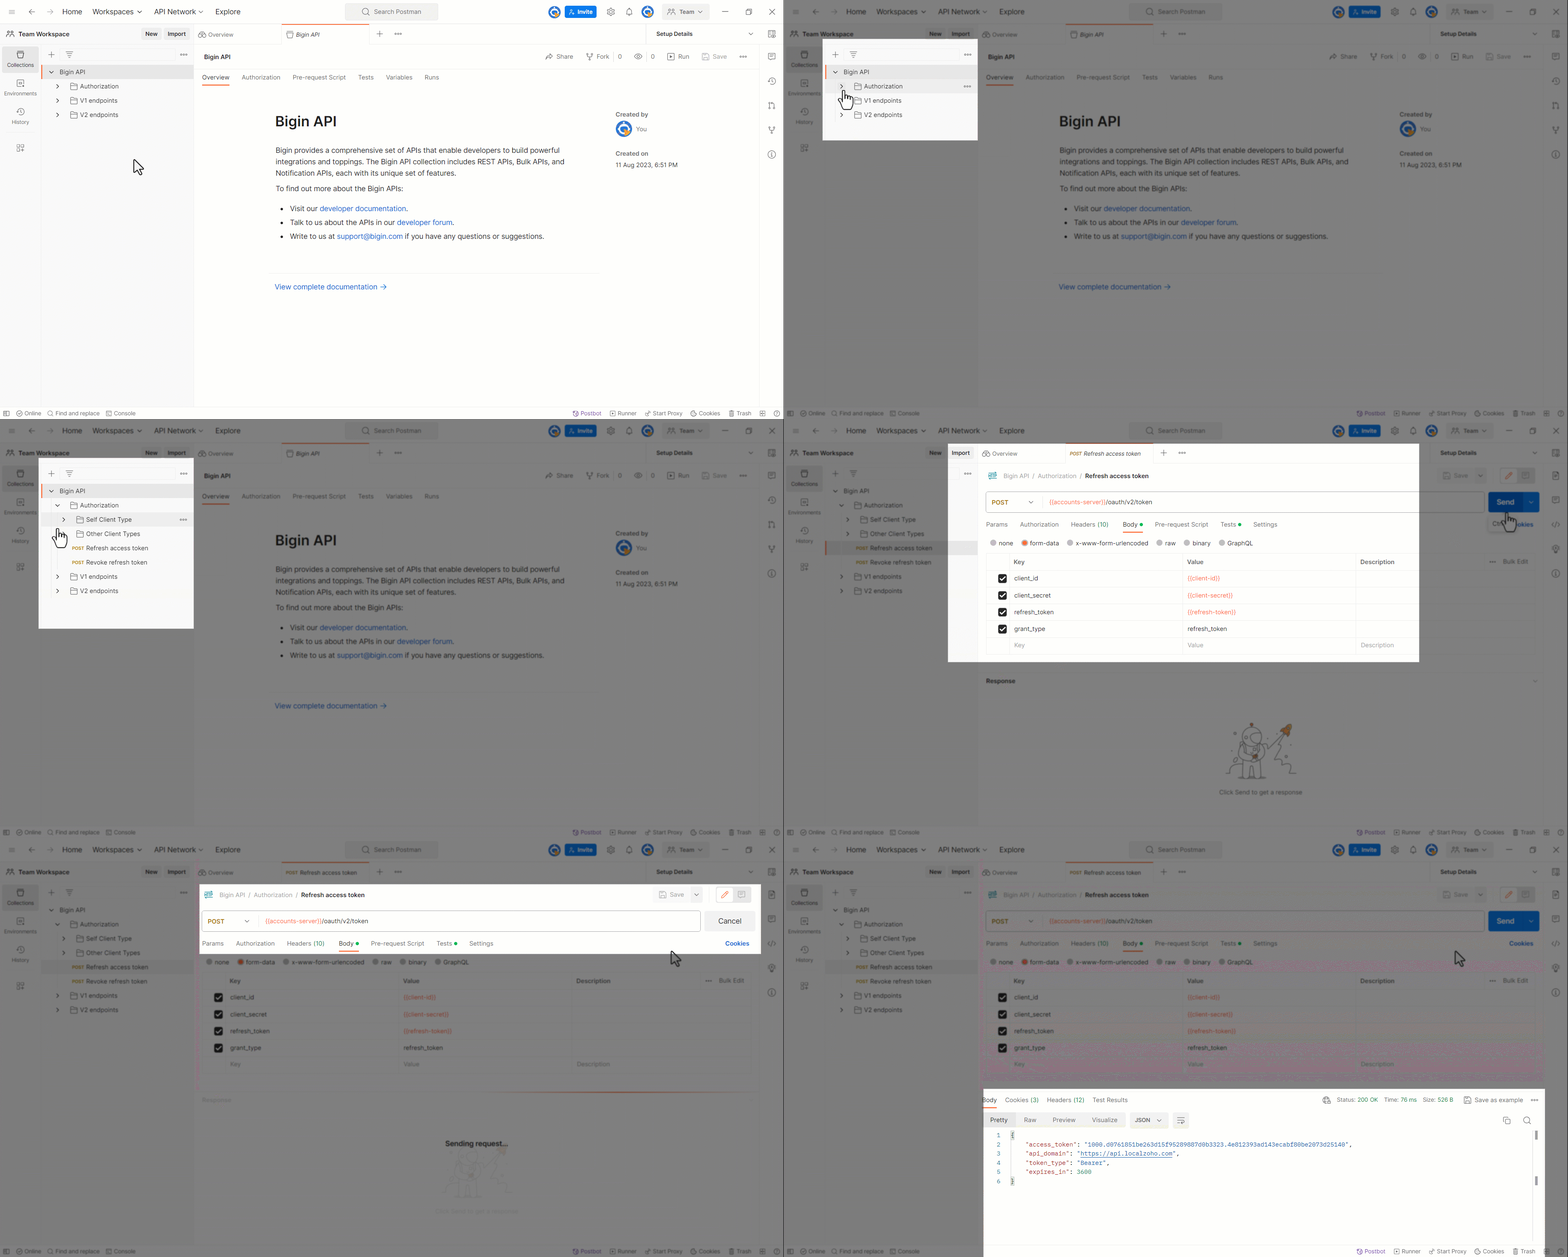
Similarly, when the access token expires, you can generate a refresh token by navigating to Authorization > Refresh access token in the workspace's left panel.
Ensure that access and refresh tokens are auto-populated in the Setup Details environment before making your initial API request.
Step 5: Invoke your first API
After you've configured your forked collection and generated access tokens, you can now use Postman to send Bigin API requests using endpoints of the collection.
In this step, select an endpoint from the collection and make an API request. To select, click the collection name and navigate to the endpoint you want to use in the workspace's left panel.
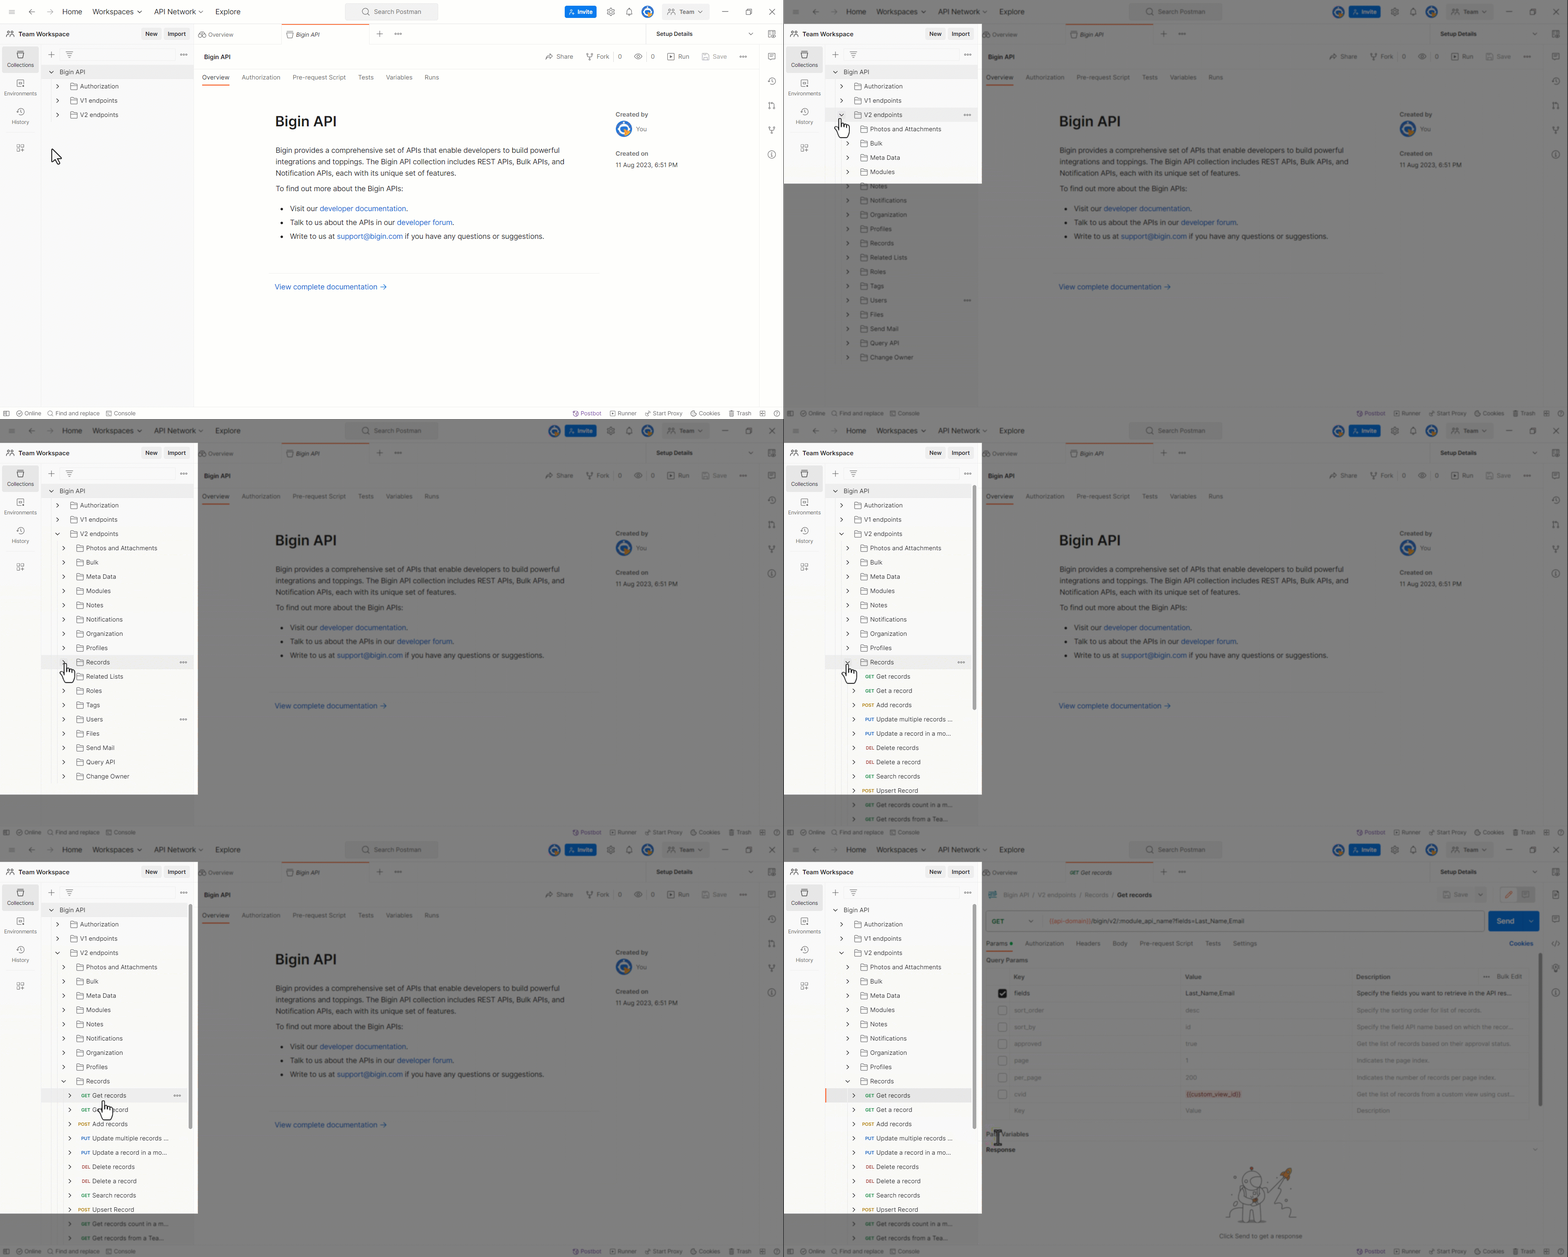
Notice that the endpoint has already been configured with the necessary details. You can modify details like query and path parameters in the Params settings to suit your needs.
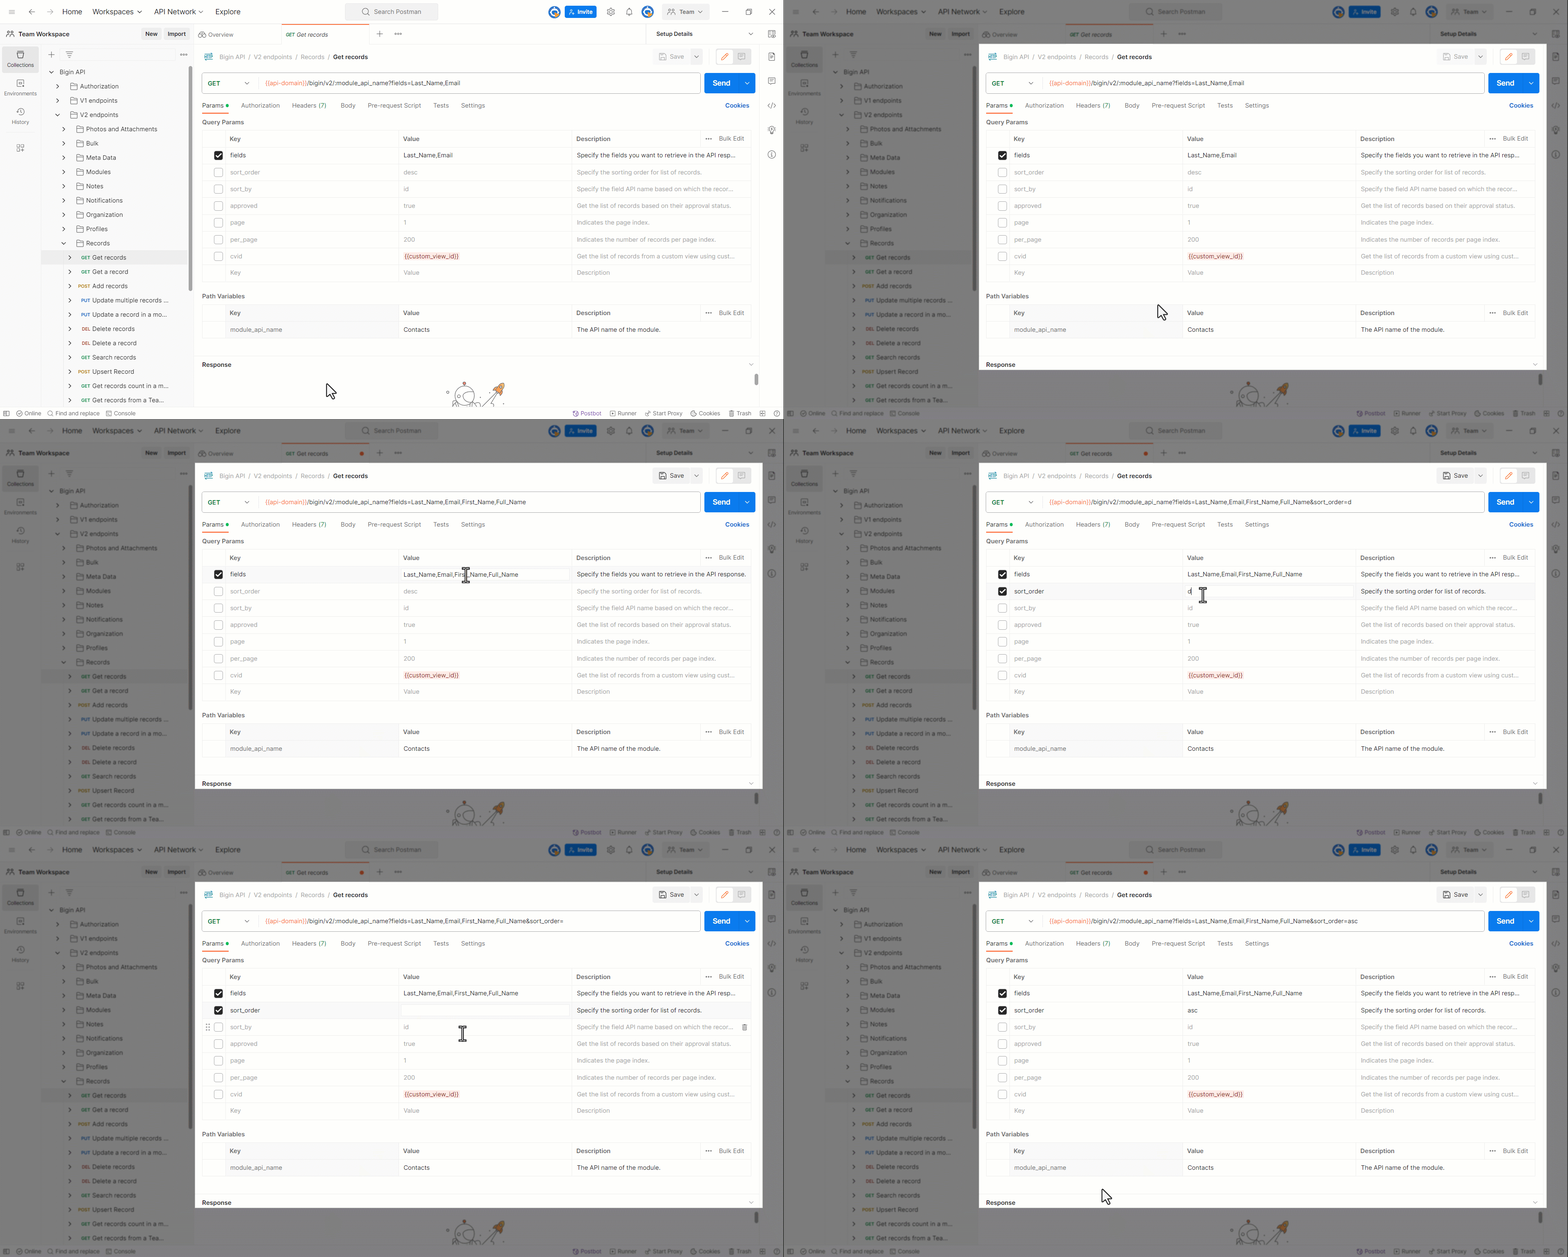
Navigate to the Authorization settings and confirm that Bearer Token is selected for the Type. Then, define the Token as the {{access-token}} variable. The {{access-token}} uses the value that you've configured in the Setup Details environment.
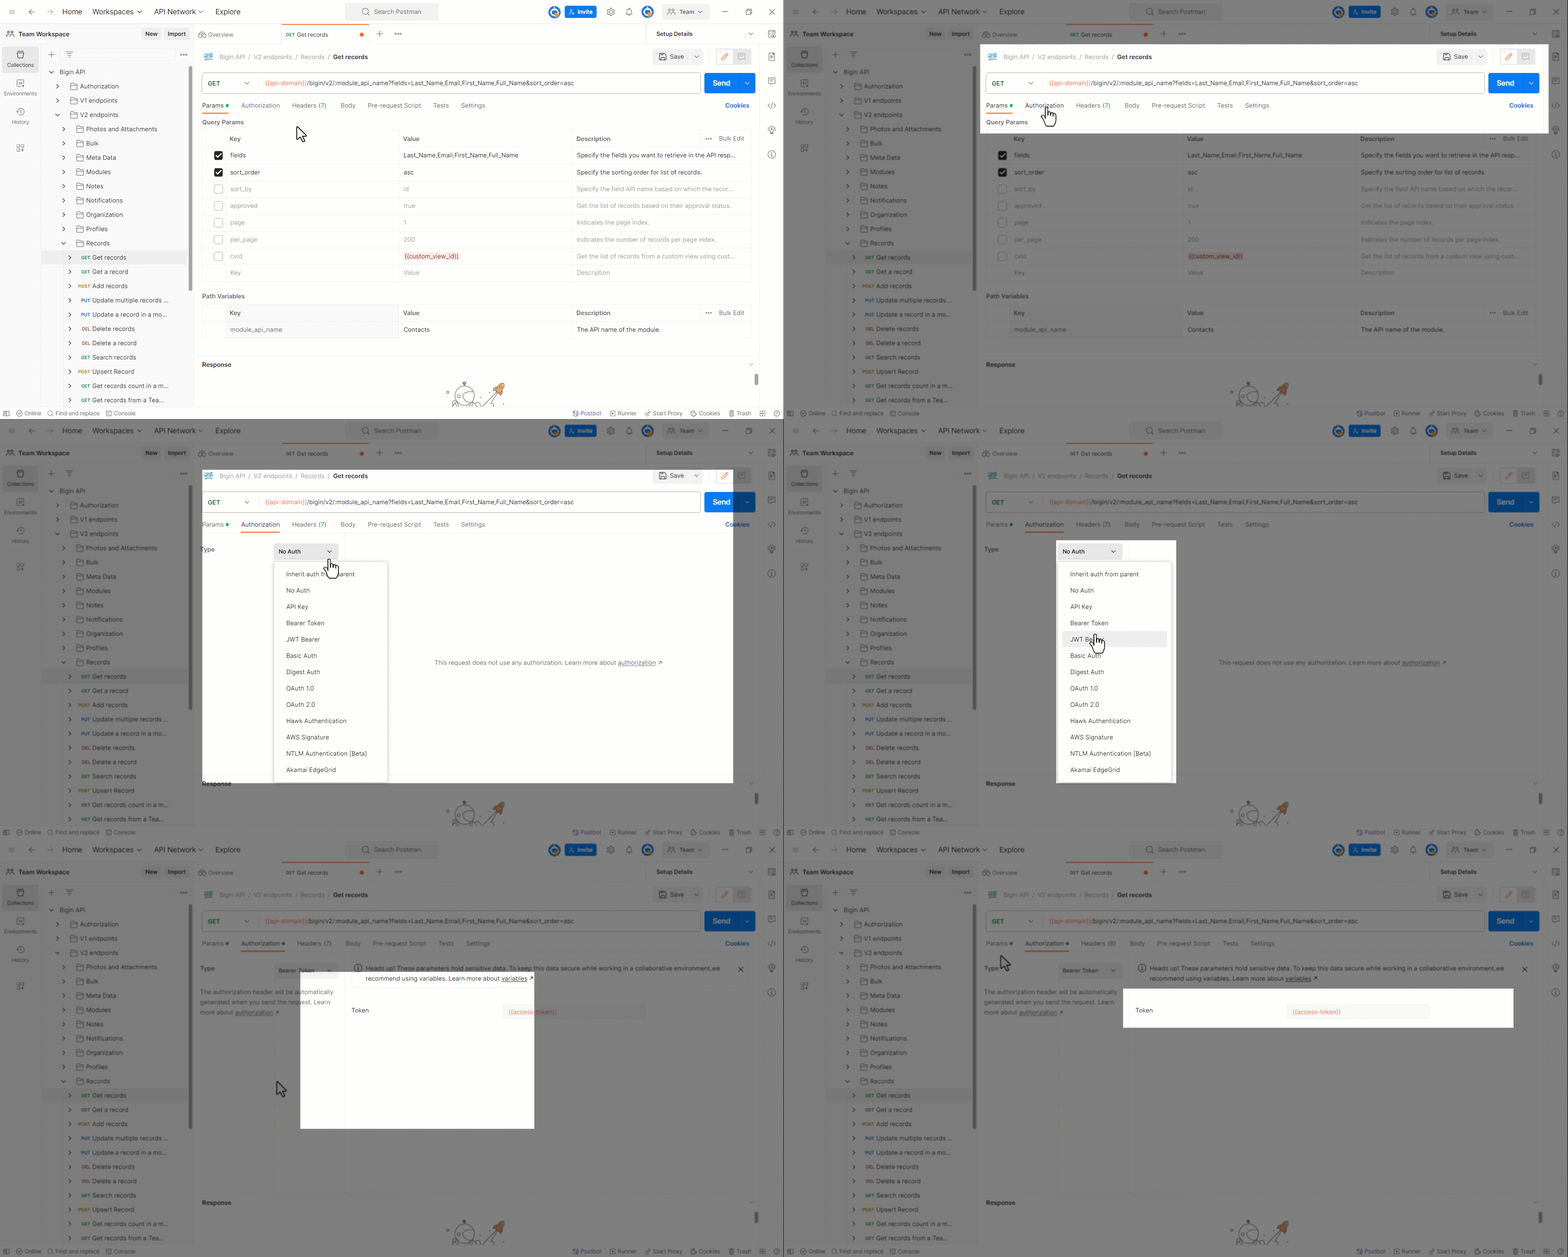
If the request includes a JSON input or file upload, go to the Body settings to provide the necessary information.
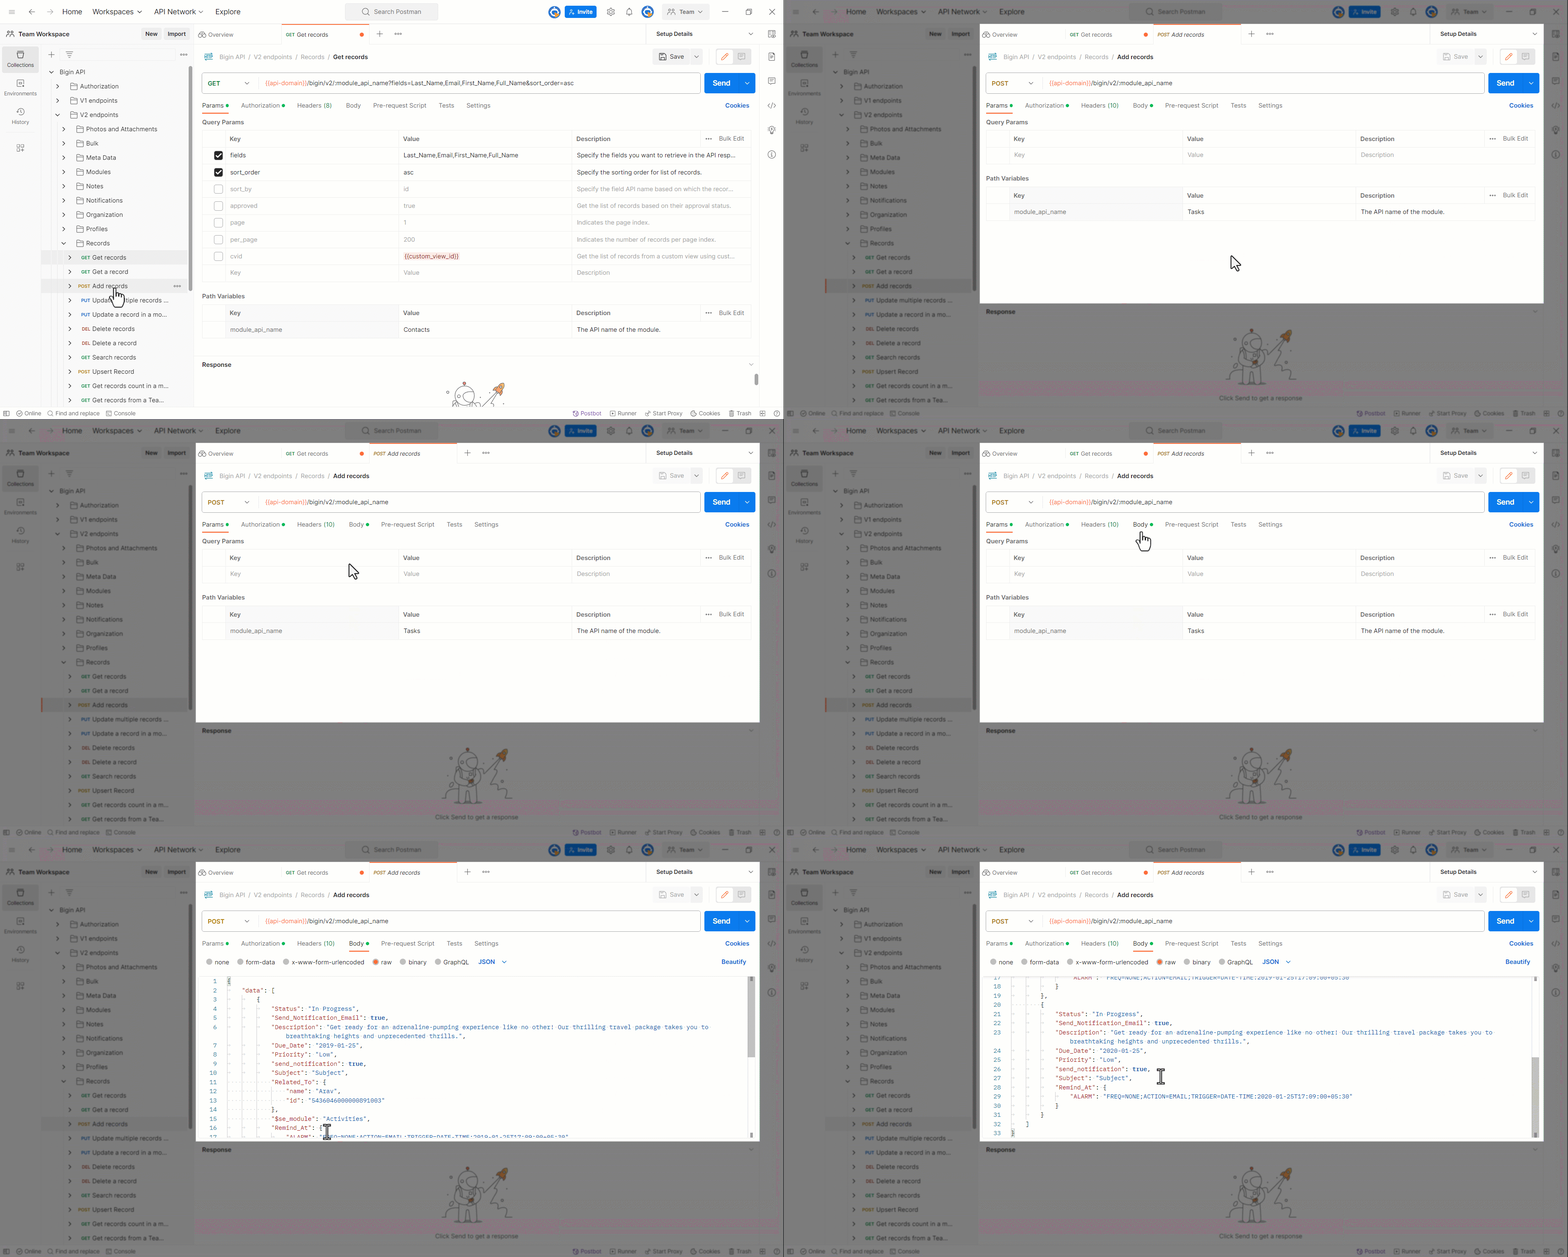
Once you've configured the necessary details of the endpoint, click the Send button next to the endpoint. If the request is successful, you'll receive the requested details.
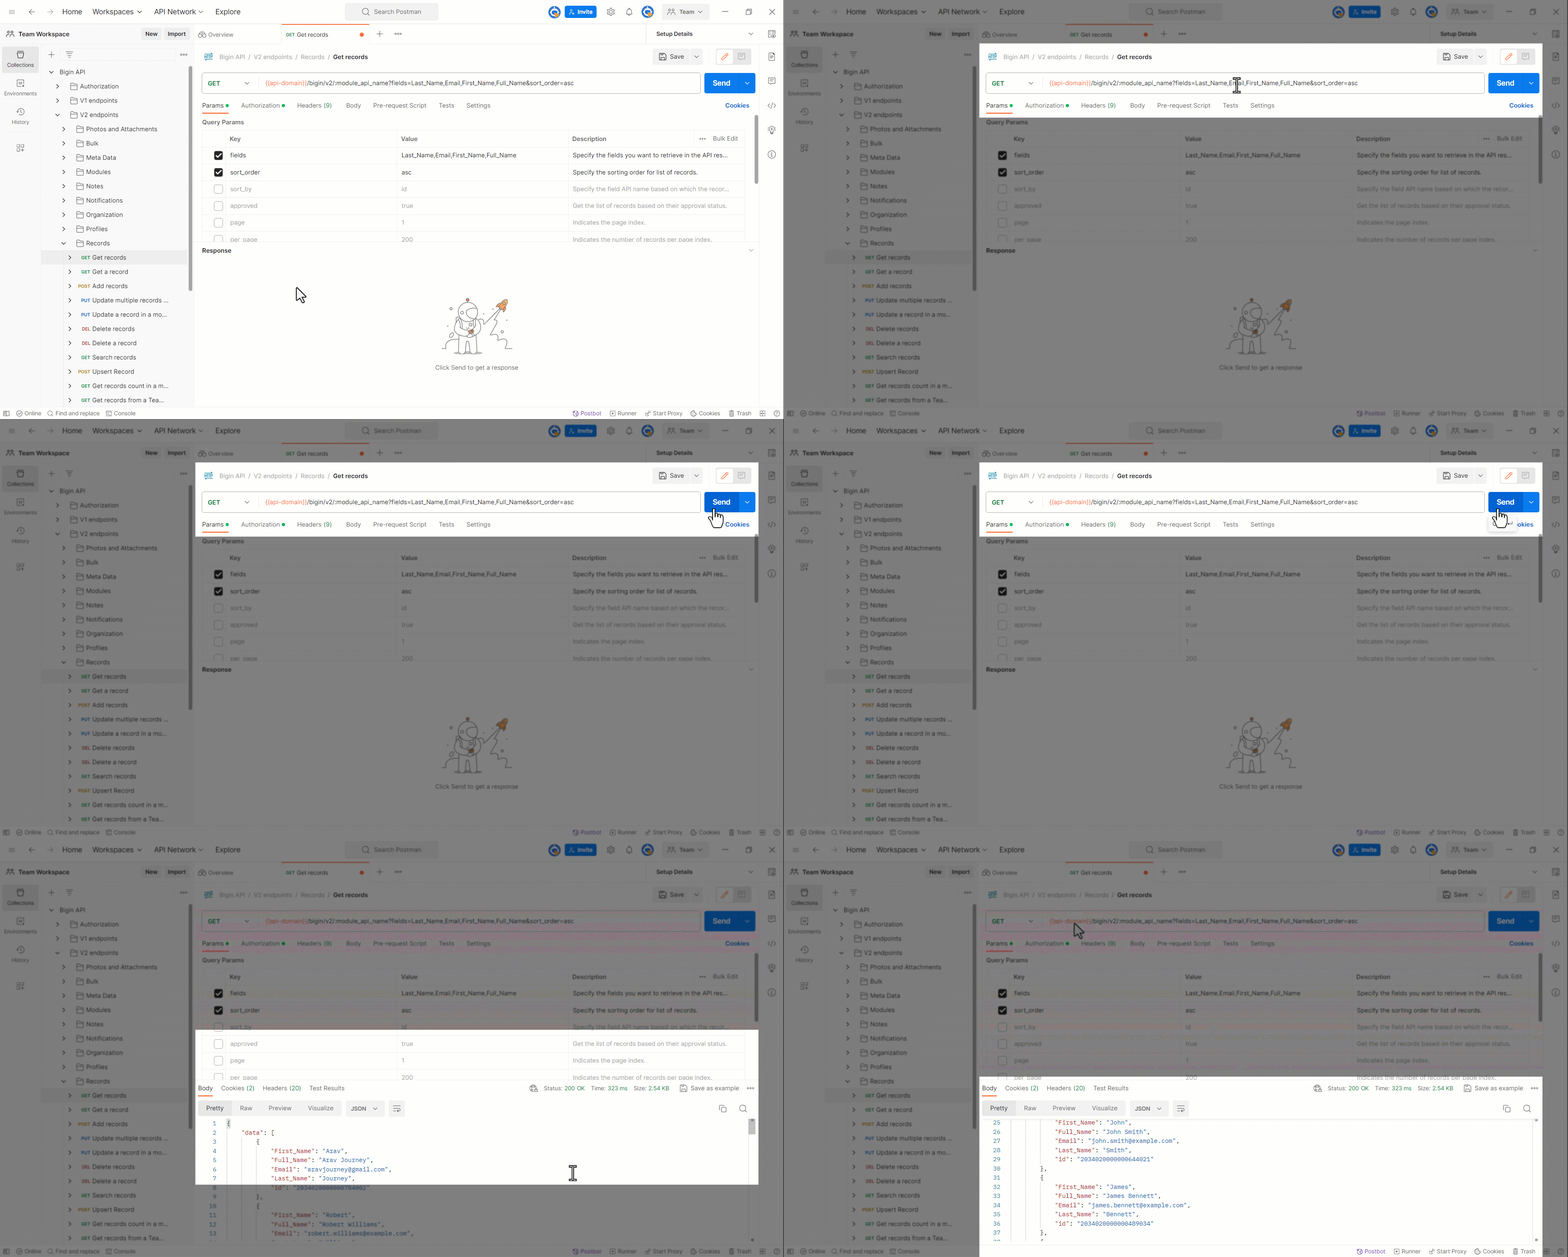
Similarly, you can test all of the API endpoints in your forked collection using Postman.